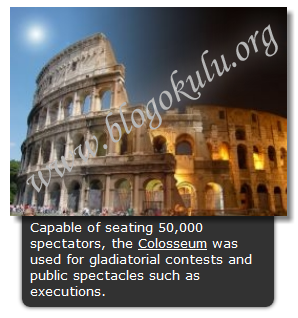
Blogunuza eklediğiniz resimleri bazen ziyaretçileriniz yorumlayamayabilir, yazağınız ufak bir not ile bu resimle anlatmak istediklerinizi ve ziyaretçilerinizin daha iyi düşünmesini, rsimle vermek istediğiniz mesajı almasını sağlayabilirsiniz.
| Ekliyeceğiniz bu eklenti ile ziyaretçi maus ile resmin üzerine geldiğinde sizin belirliyeceğiniz yönde (aşağı,yukarı,sağ,sol )bir pencere kayarak ve animasyonlu bir şekilde açılacak ve bu pencerede sizin yazdığınız notlar veya linkler belirecek, microsoft exeldeki açıklama penceresi gibi düşünün.Açıklama penceresi blogunuzdaki bütün resimlerde çıkmayacaktır sadece sizin istediğiniz ve belirlediğiniz resimlerde açıklama penceresi olacaktır. |
CSS3 ile tasarlanmış bu eklentiyi blogunuza eklemek için.
Demo Görünüm
CSS Kodlarını Ekliyelim:1-Blogger hesabımızla GİRİŞ yapıyoruz.
2-Kumanda Paneli>Şablon>Htmlyi Düzenleyolunu takip edip
3-Html kodları içerisinde ]]></b:skin> kodunu aratıp buluyoruz
4-Aşağıdaki kodu kopyalayıp bulduğumuz ]]></b:skin> kodundan önceki kısma yapıştırıyoruz.
/*================ Sliding Description Panel For Images By BlogOkulu ================*/

.imagepluscontainer {
 /* main image container */
    position: relative;
    z-index: 1;
    font-family: verdana;
    font-size: 13px;
}

.imagepluscontainer img {
 /* CSS for image within container */
    position: relative;
    z-index: 2;
    -moz-transition: all 0.5s ease;
 /* Enable CSS3 transition on all props */
    -webkit-transition: all 0.5s ease-in-out;
    -o-transition: all 0.5s ease-in-out;
    -ms-transition: all 0.5s ease-in-out;
    transition: all 0.5s ease-in-out;
}

.imagepluscontainer:hover img {
 /* CSS for image when mouse hovers over main container */
    -moz-box-shadow: 5px 5px 5px rgba(0, 0, 0, 0.5);
    -webkit-box-shadow: 5px 5px 5px rgba(0, 0, 0, 0.5);
    box-shadow: 5px 5px 5px rgba(0, 0, 0, 0.5);
    -moz-transform: scale(1.05, 1.05);
    -webkit-transform: scale(1.05, 1.05);
    -ms-transform: scale(1.05, 1.05);
    -o-transform: scale(1.05, 1.05);
    transform: scale(1.05, 1.05);
}

.imagepluscontainer div.desc {
 /* CSS for desc div of each image. */
    position: absolute;
    width: 90%;
    z-index: 1;
 /* Set z-index to that less than image's, so it's hidden beneath it */
    bottom: 0;
 /* Default position of desc div is bottom of container, setting it up to slide down */
    left: 5px;
    padding: 8px;
    background: rgba(0, 0, 0, 0.8);
 /* black bg with 80% opacity */
    color: white;
    -moz-border-radius: 0 0 8px 8px;
 /* CSS3 rounded borders */
    -webkit-border-radius: 0 0 8px 8px;
    border-radius: 0 0 8px 8px;
    opacity: 0;
 /* Set initial opacity to 0 */
    -moz-box-shadow: 0 0 6px rgba(0, 0, 0, 0.8);
 /* CSS3 shadows */
    -webkit-box-shadow: 0 0 6px rgba(0, 0, 0, 0.8);
    box-shadow: 0 0 6px rgba(0, 0, 0, 0.8);
    -moz-transition: all 0.5s ease 0.5s;
 /* Enable CSS3 transition on desc div. Final 0.5s value is the delay before animation starts */
    -webkit-transition: all 0.5s ease 0.5s;
    -o-transition: all 0.5s ease 0.5s;
    -ms-transition: all 0.5s ease 0.5s;
    transition: all 0.5s ease 0.5s;
}

.imagepluscontainer div.desc a {
    color: white;
}

.imagepluscontainer:hover div.desc {
 /* CSS for desc div when mouse hovers over main container */
    -moz-transform: translate(0, 100%);
    -webkit-transform: translate(0, 100%);
    -ms-transform: translate(0, 100%);
    -o-transform: translate(0, 100%);
    transform: translate(0, 100%);
    opacity: 1;
 /* Reveal desc DIV fully */
}

/*### Below CSS when applied to desc DIV slides the desc div from the right edge of the image ###*/

.imagepluscontainer div.rightslide {
    width: 150px;
 /* reset from default */
    top: 15px;
    right: 0;
    left: auto;
  /* reset from default */
    bottom: auto;
  /* reset from default */
    padding-left: 15px;
    -moz-border-radius: 0 8px 8px 0;
    -webkit-border-radius: 0 8px 8px 0;
    border-radius: 0 8px 8px 0;
}

.imagepluscontainer:hover div.rightslide {
    -moz-transform: translate(100%, 0);
    -webkit-transform: translate(100%, 0);
    -ms-transform: translate(100%, 0);
    -o-transform: translate(100%, 0);
    transform: translate(100%, 0);
}

/*### Below CSS when applied to desc DIV slides the desc div from the left edge of the image ###*/

.imagepluscontainer div.leftslide {
    width: 150px;
  /* reset from default */
    top: 15px;
    left: 0;
    bottom: auto;
  /* reset from default */
    padding-left: 15px;
    -moz-border-radius: 8px 0 0 8px;
    -webkit-border-radius: 8px 0 0 8px;
    border-radius: 8px 0 0 8px;
}

.imagepluscontainer:hover div.leftslide {
    -moz-transform: translate(-100%, 0);
    -webkit-transform: translate(-100%, 0);
    -ms-transform: translate(-100%, 0);
    -o-transform: translate(-100%, 0);
    transform: translate(-100%, 0);
}

/*### Below CSS when applied to desc DIV slides the desc div from the top edge of the image ###*/

.imagepluscontainer div.upslide {
    top: 0;
    bottom: auto;
  /* reset from default */
    padding-bottom: 10px;
    -moz-border-radius: 8px 8px 0 0;
    -webkit-border-radius: 8px 8px 0 0;
    border-radius: 8px 8px 0 0;
}

.imagepluscontainer:hover div.upslide {
    -moz-transform: translate(0, -100%);
    -webkit-transform: translate(0, -100%);
    -ms-transform: translate(0, -100%);
    -o-transform: translate(0, -100%);
    transform: translate(0, -100%);
}
/*================ Sliding Description Panel For Images By BlogOkulu ================*/
Bu Eklentiyi Resimlerimde Nasıl Kullanabilirim?
Açıklama penceresi eklemek istediğiniz resim için Html modundayken aşağıdaki kodu kullanacağız.
<center><div class="imagepluscontainer" style="width:263px;">
<img src="RESİM URL BURAYA">
<div class="desc downslide">
RESİM AÇIKLAMASI BURAYA
</div>
</div></center>
RESİM URL BURAYA Animasyonlu açıklama eklemek istediğiniz resmin URL sini yazıyoruz.
downslide:Animasyonlu açıklama kutusu aşağı doğru açılır bunu upslide(yukarı) rightslide (sağda) leftslide(solda) ile değiştirip açıklama kutusunun açılma yönünü belirleyebilirsiniz.
RESİM AÇIKLAMASI BURAYA Resminizin açıklamasını bu kısma yazın
width:263px:Açıklama kutusunun genişliğini burdan ayarlayabilirsiniz.

